Wine PC Compatibility Layer
Wine is a compatibility layer capable of running Windows applications on several POSIX-compliant operating systems, such as Linux, macOS, & BSD. Instead of simulating internal Windows logic like a virtual machine or emulator, Wine translates Windows API calls into POSIX calls on-the-fly, eliminating the performance and memory penalties of other methods and allowing you to cleanly integrate Windows applications into your desktop.
There are currently various options to install Wine to your current PC:
-
MacOS
- Wine-HQ available from https://wiki.winehq.org/MacOS.
- PlayOnMac available from https://www.playonmac.com.
- Wineskin-Winery available from https://sourceforge.net/projects/wineskin/.
-
Linux OS (Mainly Ubuntu Distro with GOME GUI)
- Wine-HQ available from https://wiki.winehq.org/Ubuntu.
- PlayOnLinux available from https://www.playonlinux.com/.
Linux Wine-HQ Installation
Here is the procedure to install Wine Compatibility Layer into a Linux based Computer running Ubuntu Distribution with GNOME Graphical User Interface. As this is Linux, we need to open up the Linux Terminal run the commands.
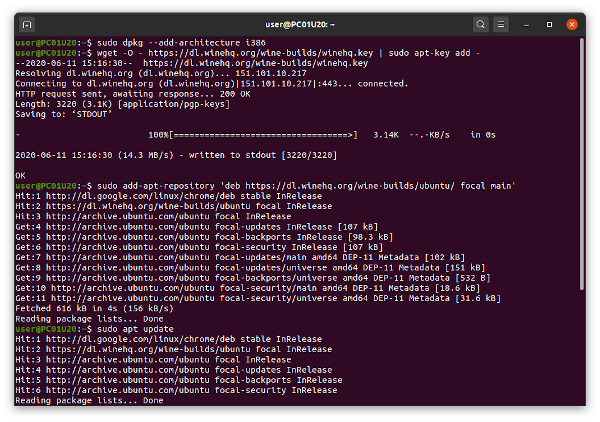
$ sudo dpkg --add-architecture i386
$ wget -O - https://dl.winehq.org/wine-builds/winehq.key | sudo apt-key add -
$ sudo add-apt-repository 'deb https://dl.winehq.org/wine-builds/ubuntu/ focal main'
$ sudo apt update
$ sudo apt install --install-recommends winehq-stable
And to check if it has been properly installed:
$ wine --version
# > 5.0.1

$ wine control
# prompted to install wine momo
# prompted to also install geko
# both need complete the installation in order to do the following steps.
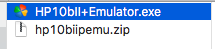
Download software into Download folder. Type the following command to check the file was downloaded.
$ ls ~/.wine/drive\_c/users/$USER/Downloads
# in this example, we assumed that hp10biipemu.zip was downloaded.

$ unzip hp10biipemu.zip
# inflating: HP10bII+Emulator.exe
Type the following command to install the download software…
$ wine ~/.wine/drive\_c/users/$USER/Downloads/HP10bII+Emulator.exe
Follow the wizard to complete the installation. After installation, run the following command to test…
$ cd "/home/$USER/.wine/drive\_c/Program Files (x86)/Hewlett-Packard/HP 10bII+ Virtual Calculator"
$ dir
## 10bII+\_compact.bmp 10bII+\_small.bmp HPUpdateCheck.dll segments.bmp
## ...
## HP10bII+.exe HP\_10bII+\_Users\_Guide.pdf
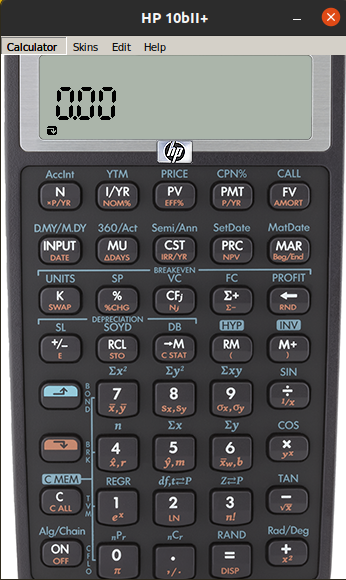
$ wine HP10bII+.exe
It should launch the application software.
Next step is to create a short on the desktop to launch the application. A copy of the desktop launcher is stored in the $HOME/.local/share/applications/wine/Programs folder.
ls $HOME/.local/share/applications/wine/Programs/'HP Calculators'
\# 'HP 10bII+ Virtual Calculator.desktop'

cp $HOME/.local/share/applications/wine/Programs/'HP Calculators'/'HP 10bII+ Virtual Calculator.desktop' $HOME/Desktop
Next, right click on the HP10bII+.desktop icon and select Allow Launching.
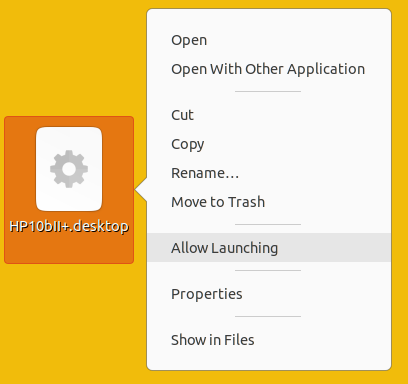
This will convert the raw icon to a finished launcher. From here on, you could use the Launcher to start the application.
Apple MacOS PlayOnMac Installation
Download for PlayOnMac Version 4.3.4.
Version PlayOnMac Version 4.3.4 is a 32-bit implementation of Wine, therefore it is NOT COMPATIBLE with the 64-bit only MacOS version 10.15 (Catalina and beyond). It will work with version 10.10 (Yosemite) though to version 10.14 (Mojave).
If you are running MacOS Catalina, you can use Wineskin Winery (see below) as a workaround.
To run PlayOnMac, you need to download and install XQuartz. XQuartz is an open-source version of the X Window System (X11) that runs on macOS.
Download for XQuartz Version 2.7.11.
After downloading XQuartz, navigate using Filer and go to the Downloads Folder. Double click the Wine-MOS-XQuartz-2.7.11.zip to unzip it. Open XQuartz-2.7.11.dmg and double click XQuartz.pkg to install it. XQuartz runs in the background, so it need not access it. However if you which to verify that is was properly installed, open Launchpad search for XQuartz to run it. Then select XQuartz > X11 from the Apple Application Menu Bar.
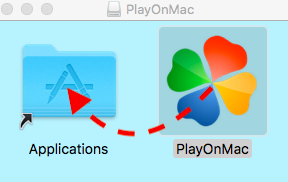
Next, navigate using Filer and go to the Downloads Folder. Double click the Wine-MOS-PlayOnMac_4.3.4.zip to unzip it. Open PlayOnMac_4.3.4.dmg and click then drag PlayOnMac icon and drop it into Applications folder to install it.
Open Launchpad search for PlayOnMac to run it to verify the installation was done successfully. Exit the app, and use finder to browse to the Downloads folder.
Double click on the .zip file to extract the file. Next, double click on the .exe and follow the installation wizard. When prompted “What is the name of you(r) program?”, typing in HP and click the Next button. This will start the HP installation program installation wizard. Again, follow the wizard till you see the Finish button. Now it jump back to the PlayonMac screen, next this is an important step to generate the selection list icon.
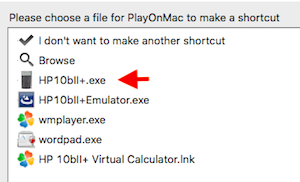
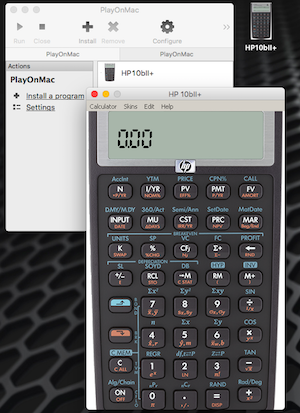
If successfully installed, you will be able to see the Apps on the selection list and an application launcher on the Desktop.
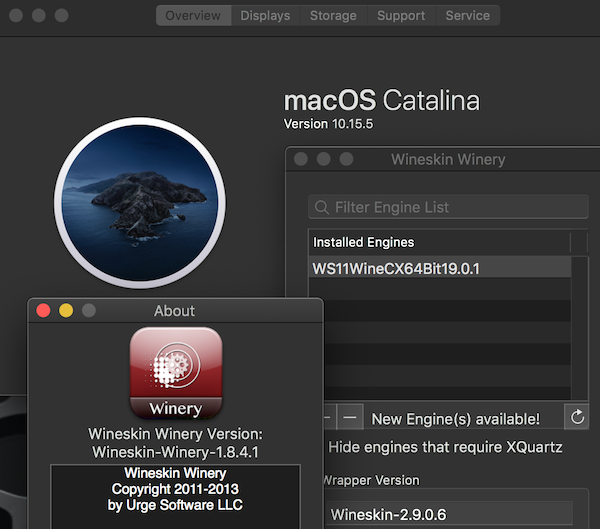
Apple MacOS Wineskin Winery Installation
Wineskin Winery is a management and wrapper creation program. Wineskin is a tool used to wrap Wine (a Windows compatibility layer) to run Windows software on Mac OS X. The wrappers are in the form of a normal Mac .app Application, which can be double clicked and ran just like a native app. It is bundled with Wineskin Engines (WineskinX11), a custom version of X11 from XQuartz.
Download Wineskin Winery Version 1.8.4.1.
This version was tested to work only in MacOS version 10.15 (Catalina).
Launch WineskinWinery App.
Next need is to:
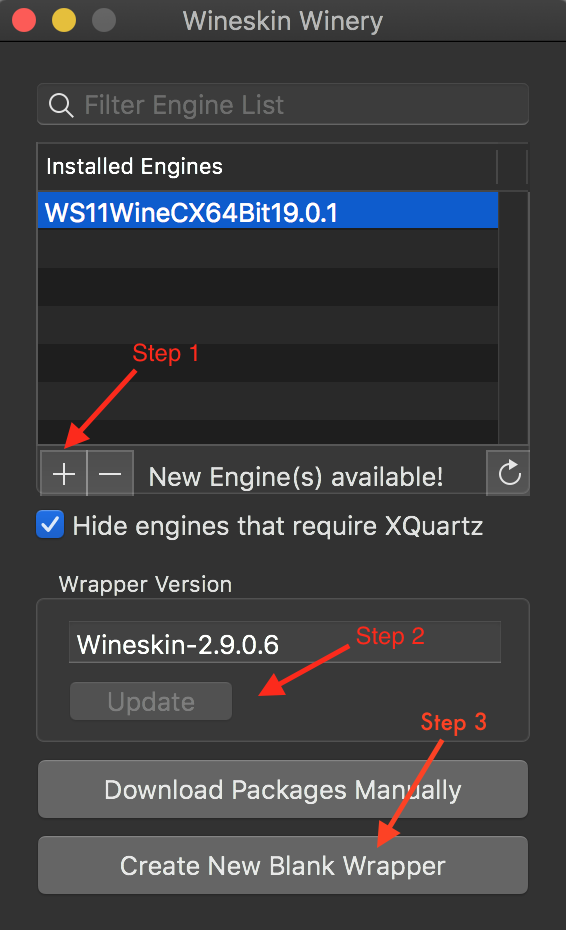
- Click [ + ] button and select WS11WineCX64Bit19.0.1.
- Click [ Update ] button to pull in wrapper.
- Click [ Create New Blank Wrapper ] button and type “HP 10bII+ Emulator”. Assuming that you have downloaded a Windows software that is to be installed.
App wrapper (container) will be created.
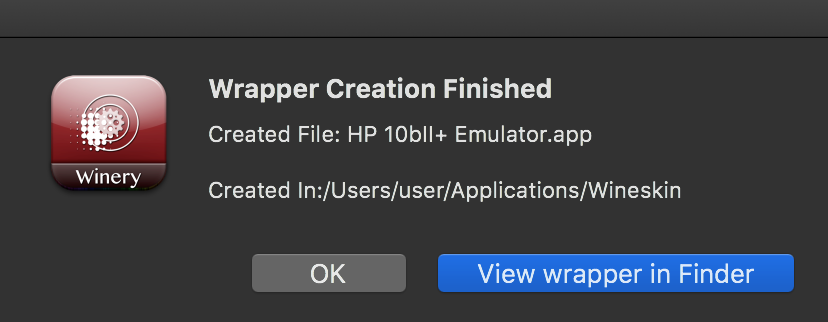
Click “View wrapper in Finder” button and double click “HP 10bII+ Emulator” to start Wineskin configuration…

Step A - click [ Install Software ] button.
Step B - click [ Choose Setup Executable and browse the download folder and look for the exe file that was downloaded and unzipped earlier.
Step C - double click “HP10bII+Emulator.exe” to launch the setup program.
Step D - click [ OK ] button.
Step E - click [ Next ] button and follow the installation wizard.
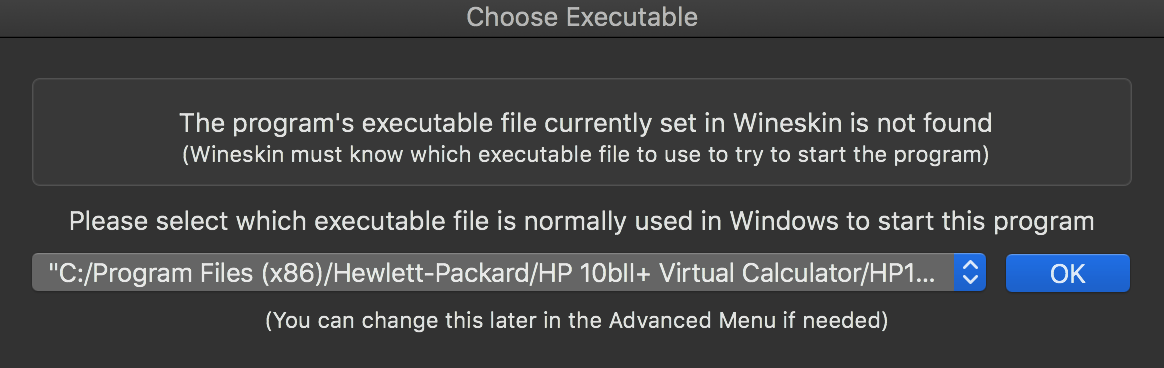
Launch the installed App. At the first launch you will be prompted to select the executable.